Showing posts with label clip and grow. Show all posts

Sunday, 11 February 2018

Which is the best front?

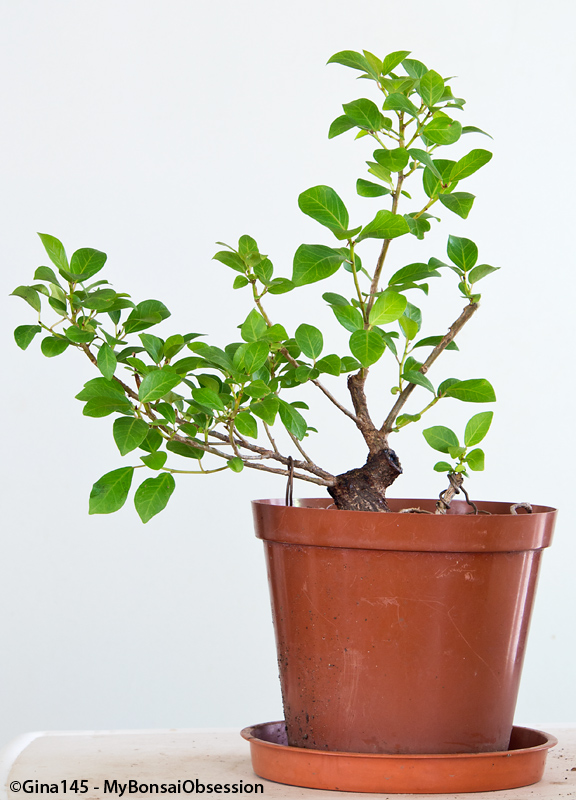
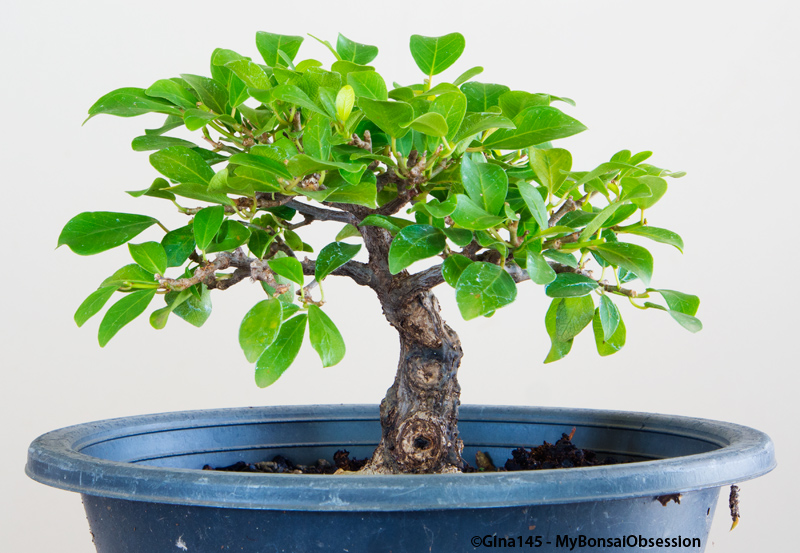
I thought I had my clip and grow Ficus Natalensis all sorted out. It's been hard work getting it to where it is without ever using wire, but over time it's filled out nicely. It's come a long way since this old photo from late 2015:


This summer I've been concentrating entirely on ramification, giving it only the occasional rough haircut to encourage as much back budding as possible. By this week it had grown so full that the trunk was hardly visible any more:

February 2018 - before pruning

Yesterday's club meeting was of a practical nature and we were asked to bring along trees for discussion or work, so I took the little guy along to see if I could get some new ideas that might improve it. I decided to allow the speaker to prune the tree, instructing him only that no wiring was allowed. He didn't do anything too drastic, or so I thought.

February 2018 - after pruning

Because the trunk had been hidden behind foliage for so long, it was only when I got home that I realised that this wasn't my front. My intended front currently looks like this, with a stick inserted to pull back some of the foliage that's still blocking the view:

February 2018 - current view of my intended front

Now I'm confused. His trunk line actually looks good, but there's an issue with the nebari. From my intended front, the tree has a fairly solid base, though the root on the left could do with a bit of thickening.


From his front, the trunk below the bend is rather straight and the roots aren't great. The left one is really weak and the thicker root on the right is badly positioned, meaning I might have to remove it in favour of the weaker one:


Still, that can be fixed. For now I'm considering raising the soil level to see if those roots fatten up. I hope they do, because I think the branch structure probably is better from his chosen front.

A little bit of wiring would have everything so much simpler!

Thursday, 22 June 2017

Last Cut of the Season

After my last post about my Clip and Grow Ficus I thought I was done for the season. After six months of solid growth and minimal pruning it was time to let the new branches fatten up. But things don't always work out quite as planned.

One of my Reddit readers suggested that I wire some movement into the new branches while they were still young and flexible. As I'm gradually overcoming my aversion to wiring my trees, I decided to follow his advice.

After wiring it, I took the tree to a club meeting for feedback. One of the senior members suggested that I remove the lower branches that have been bothering me for so long. Another wanted to know what I was planning to do with the top, which was looking rather two dimensional. I decided it was time to deal with both issues.

Since that meeting I've removed those branches and trimmed the sharp bends at the two chop sites so that the movement in the trunk now looks a lot more natural. And by twisting the newly wired leader I was able to create a back branch, giving the tree a much more three dimensional appearance.

This is how it looks today:

June 2017

And now it really is time for it to have a rest.

The next move will be to repot it in spring. It's time to remove the root cutting as well as the roots growing around the rim of the pot:

Root cutting (right) and messy roots

Sunday, 5 March 2017

Clip and Grow Ficus - the Third Chop and Beyond

This little Ficus Natalensis has far exceeded my expectations in terms of the progress it made this summer. When I wrote about its second chop back in September, I was expecting to let it grow unchecked for the rest of the season.

August 2016 - after the second chop

However when I saw how much it had grown by December 2016, I reconsidered my decision.

December 2016 - before pruning

While I knew that the new leader still needed to thicken more, I followed my mentor's advice and cut it back to the third branch to allow it and the two branches growing from it to develop in better proportion. As the leaves were looking rather ragged due to hail damage, I decided to defoliate the tree at the same time.

December 2016 - after pruning and defoliation

It soon filled out again.

February 2017 - before pruning

A few days ago when I brought it inside to get a  photo for this post,  I realised that the branch on the right was becoming too dominant so I shortened that one.

February 2017 - after pruning

And that I expect will be the last work I do on it for quite some time. Hopefully now the branches will thicken in better proportion.

The two bottom branches on the left will probably be removed at a later date as there is no branch to balance the composition on the right hand side. With the frame that is starting to develop higher up, I suspect that once the tree fattens up, it won't need branches so low down anyway.

The root cutting has finally decided it wants to become another tree.

February 2017 - base of trunk and root cutting

With winter approaching I've decided to leave it with its parent tree until early next summer, so the move to a larger pot will have to wait.

Saturday, 28 January 2017

A Year Spent Watching a Trident Maple Grow

At some stages in a tree's development it's best to do nothing other than leave it to grow. Such was the situation with the Trident Maple I first discussed in my post Building a Trunk in late 2015.

It was unfortunate that I was forced to repot that tree at the time that I cut the trunk back because I'm sure that the heavy root pruning I did back then has slowed its development somewhat. Still it's grown a lot since I picked my new leader - the lower of the two options I discussed in that post. The thin flimsy leader  has thickened substantially and now extends about three feet above the chop site. I also have a branch where there was little more than a bud when that post was written. This is what it looked like after a year of unrestrained growth.

January 2017- before trim and wiring

I won't even think about shortening that leader for at least another year as it's not thick enough yet. Besides I'd like to fatten up the trunk a bit more too.

When I brought it inside today, the photo above was all I had planned but on closer inspection I decided it was time to position the side branch properly while it's still young and flexible. At the same time I shortened the branch because, for now, my main focus is on thickening the leader. I don't want that branch to fatten up too much until I start developing other branches either because I'd hate it to grow out of proportion to the rest of the tree.

Branch pruned and wired. The leader was left intact.

Just when I thought that I was done I realised that I needed to clean away the moss growing up the base of the trunk. In so doing I discovered that the base is actually somewhat thicker than I realised. Rotating the tree I also found that the base looks better from what I thought was the back of the tree, while the rest of the tree doesn't really suffer from a change of front.

New front. The section below the wire was hidden by the moss.

I'll need to change the slant when I repot it because it's now leaning slightly backwards, but that's only a minor issue. I'll also have to remove the root marked with an arrow in the photo below.

View of base from old and new fronts.

As it's already late in the growing season I'm planning to leave dealing with both of those issues until spring when I'll probably move the tree into a bigger pot.

I've been battling with this tree for years now, but at last I feel like it's starting to show some promise. It still has a long way to go though.

Thursday, 15 September 2016

Clip and Grow Ficus - the Second Chop

This Ficus Natalensis is one of those I first discussed in my post Clip and Grow Bonsai about six months ago. When I wrote that post I discussed how I intended to proceed this summer and things have gone more or less to plan so far. Only my intention to put it into a bigger pot has been put on hold until later in the season.

The reason for that delay is because I cut a fairly large surface root and have left it in the pot, hoping a new tree will develop from that root. If that happens I'd like to remove the new tree when I repot this one.

This is what it looked like before I started work:

August 2016 - before chop

Although someone at my club suggested I make the chop one branch higher, I decided to stick to what felt right to me. One quick chop and I was left with this:

August 2016 - after chop

As we moved from winter into spring the tree dropped all its old foliage, but not before new buds started developing everywhere.

Here are two shots from yesterday:

September 2016 - possible front

The above is my probable front, though I may change my mind when I see how the tree develops. It depends whether I decide to keep the left branch. I'm not sure it's in the best position, but for now it's the only one I've got.

September 2016 - possible back

From this side it's clearly visible that, in addition to lots of new buds on the leader and branch, the tree is producing new growth all over the trunk too. As my main focus is on thickening the new leader, I'll probably remove those unwanted buds. After that I'm unlikely to do anything more to the tree this summer other than repotting it when and if that root decides to grow.


When I made the chop last month, I planted the top as a cutting but soon noticed that it was drooping and in due course it lost all its leaves. I'm happy to report that in the last few days I've noticed new leaves developing though, so I'm optimistic that it's developing roots too.

I hate to waste anything that can grow, but I'm slowly learning not to keep the smallest cuttings. Given the fact that Ficus Natalensis grows quickly, however, this one was too good to waste.

Friday, 11 March 2016

Clip and Grow Bonsai

An article I read last night indicated that wiring is almost essential to the bonsai process. That's not what I wanted to hear. I try to keep the amount of wiring I do to an absolute minimum.

The reason I dislike wiring is partly down to sheer laziness. It takes a lot of time and patience to wire every branch of a tree, right down to the tiniest twigs. And then there's the need to watch the tree closely to ensure the wires are removed before they bite so hard that they create deep scars which may never heal completely. That becomes a problem when you've got as many trees as I have.

But I've got a better reason. I'm okay with wiring thin branches, but my hands aren't strong enough to cope with heavy wire and even if I succeed in applying it, bending a newly wired branch into the desired shape is often beyond my capabilities. I don't want to become too dependent on the men at my club to do that for me. I'd hate to think that all my trees were the product of someone else's labour. Where's the fun in that!

Followers of the Lingnan School of Penjing grow naturally styled trees using the clip and grow method. I'd like to learn more about the steps they take in the development of their trees, but I'm struggling to find any literature on the subject. It's never been discussed at my club either.

So I've been trying to solve the riddle for myself. I have one little tree that has never been wired:

Ficus Natalensis - March 2016

It's one of the two I discussed in my post Two Ficuses - Bonsai in Training. The second tree in that post has had the two lowest branches wired once to reposition them slightly.

Ficus Natalensis - March 2016

Today I'm discussing a tree which is still in a much earlier stage of development. I'm taking this one really slowly.

Ficus Natalensis - March 2016

It doesn't look like much from this angle, but the good part is hiding behind the lip of the pot.

It's another Ficus Natalensis (indigenous to South Africa), genetically identical to the two above. They're all trees I propagated from either branch or root cuttings. Well strictly speaking this one propagated itself. I'd cut a surface root off its parent tree but didn't remove it from the pot. Having started life in a shared pot, the tree naturally grew at a slant as it reached for light beyond its parent's shadow.

Before I repotted this tree I'd made the mistake of growing most of my trees upright. Fortunately I had the sense to keep this one at its chosen angle.

Ficus Natalensis - December 2012

I'm not sure how long after I separated it this photo was taken, but it must have been a while because it was looking rather pot bound. This was what it looked like after its first pruning, one which I realise with hindsight was rather premature.

I didn't do too much to it for the next year. Then I discovered a photo which I took as inspiration for styling a slim slanting tree. At that stage I picked a new leader, leaving me with this:

Ficus Natalensis - December 2013

The tree, however, had other ideas and soon put out a lot of low growth.

Ficus Natalensis - March 2014

Seven months later it was looking nothing like the tree I'd planned.

Ficus Natalensis - July 2014

By then I had a new idea about where I wanted to go, but I wasn't going to rush things, so I waited another eight months for my new leader to thicken, then made a really drastic chop.

Ficus Natalensis - March 2015

In the last year it's grown quite vigorously and that leader has thickened substantially.

Ficus Natalensis - March 2016

When I brought it inside to photograph it for this post, I removed a couple of unwanted aerial roots and one tiny branch from where there were two growing at the same point. I'm not planning to do anything major until next summer, when I plan to move it to a bigger pot. For now I might shorten some of the top branches to encourage more growth lower down, but that's about it.

My future plans are to do another major chop as illustrated here:

Planned spot for future chop

Before I do that, however, I want both the current and future headers to thicken up a bit more.

Just where it goes after the next chop remains to be seen. As this tree has had a major say in every step I've taken so far, it may well make that decision for me.

I've no idea how long it will take before this tree starts to resemble bonsai, but that's okay. I'm prepared to wait as long as it takes.

Saturday, 26 December 2015

Two Ficuses - Bonsai in Training

Today I present you with two trees that I've been working on for a while. They're one of my favourite species - Ficus Natalensis, a tree indigenous to South Africa.

Two overgrown ficuses - bonsai in training

To the bonsai newbie it may come as a surprise that these "bushes" have already been in training for a few years, but after a quick haircut all will be revealed. Ficus Natalensis is a vigorous grower and most of the excess foliage is this season's growth.

The tree on the left was grown from a cutting - a small branch I removed from one of my older trees several years ago. The one on the right started its life as an unwanted root from the tree I used as the subject of an article I published at HubPages a few years ago. It was propagated when the parent tree first went into a bonsai pot in October 2010.

Both trees were allowed to grow to several times their current height before their training started and once looked similar to this tree which I plan to discuss in a future post:

Another tree in an earlier stage of development

I don't believe in wasting anything that can grow, so the tops of both have since become trees in their own right.

But back to today's trees. First the tree on the left.

Before pruning

Ficus Natalensis has a tendency to put out aerial roots which can sometimes find their way into unexpected places as can be seen in this photo from my post on two other ficuses which I had neglected for some time. A root from one tree grew across the gap into the other tree's pot.

Overgrown roots

In the right place, aerial roots can be desirable, but the one I found on this tree was not.

Unwanted aerial root

It had to go.

Next I got down to shortening branches. I need to be very selective when it comes to pruning this tree as I've been growing it using the clip and grow method, denying myself the option of wiring branches to correct their position. Growing bonsai this way can be quite challenging and, while I try not to do more wiring than necessary on my other trees, I do use some wire on most of them.

With more than half the foliage removed, it looks more like a little tree, though I don't feel it's ready to go into a bonsai pot just yet. I'll let it grow for a few months now, and then I'll repeat the process.

After pruning

On to the second tree.

This one was not quite as simple as I thought it would be. As it was growing too low in its pot to photograph properly, I decided to take it out of the pot while I was working on it. As it turned out, the roots were all at the top and when I lifted it, most of the soil was left behind.

Removed from old pot

Under the circumstances I decided to repot it properly.

That proved to be a wise decision because below the fine rootage there was a big fat root growing in circles. It probably grew like that while it was still in the smaller pot it started its life in. I removed that root and planted it in its own pot to see if it will grow.

As my tree clearly didn't need so much soil, I moved it into a shallower pot.

Repotted and waiting to be pruned

After that all that was required was a rough haircut, with a little caution required because there was a spider lurking between the branches.

Repotted - after being pruned

I'm embarrassed to admit that I potted it at a bad angle, and had to adjust that after this photo was taken, but I guess the photo gives a fair idea of how the tree looks right now. After pruning it is approximately eight inches high, excluding the roots. In time I may reduce the height further.

This one will be spending the next couple of weeks in the shade while it recovers from its root surgery. The other tree is already back in the sunny spot it calls home.


Linking up with Inspire Me Monday.

Monday, 14 December 2015

Back from the brink of disaster

My last post ended on rather a negative note. I'd totally lost my way in trying to turn a young fig tree into bonsai after making a chop that I soon came to regret. My poor little tree ended up looking like this:
August 2010 - extreme chop

Under the circumstances I wasn't too surprised to receive a comment on Facebook saying "I would've thrown it away!"

It's not in my nature to do that though. My trees are my babies, and while there's life, there's hope.

But I really didn't know where to go from there. So I did the only thing I could do - nothing. I just left the tree to do its own thing and waited for it to present me with some new options.

If I'd been working with a different species, it may well have grown a new branch close to the cut, and in time I'd have been able to revert to the original design, but this tree has a mind of its own, so I was forced to work with the leaders it produced.

I would let it grow for a while, then pick the leader I wanted and cut back to redirect its energy in the desired direction. I don't believe that I did any wiring over the next five years.

Finally last week I decided that it was time to commit to what I had. Here is how my peculiar little tree looked in all its overgrown glory:

December 2015 - before pruning

As it was growing rather low in the pot, I took it out to get a better view of its structure.

December 2015 - before pruning

It had developed a lot over the last five years, but I didn't find that view too pleasing so I tried rotating it, and found a view that looked slightly better.

December 2015 - before pruning

Before going further I decided to take it for a critique at my bonsai club. I must confess that I was a little nervous as to how people would view this rather quirky tree that I was trying to pass off as bonsai material. After all, it breaks just about every rule I've ever been taught.

I was in for a pleasant surprise. Once people looked beyond the long sacrificial branches, they could see that what I had grown was a "fun" tree with some interesting curves.

Rather than remove a branch that was in a totally wrong place, it was suggested that I thread it through the first bend in the trunk to give me a branch on the side that was bare. In most cases that would be inappropriate, but for this tree it just felt right, so that's what I've done. Now that branch needs to thicken up until it's in proportion with the rest of the tree.

This was the suggested front:

December 2015 - after pruning

After giving it some thought, however, I wasn't sure that I like that angle. I prefer this view:

December 2015 - after pruning

I haven't totally committed to it yet, but if I do, I'll need to remove one small branch which is coming straight forward. For now, however, my final step was to defoliate the tree to help it recover from having its roots pruned.

December 2015 - after pruning and defoliation

I know this tree won't be to everyone's liking, but I'm quite pleased with how it turned out after such a disastrous beginning.

Thursday, 3 December 2015

My First Workshop

I still remember the first bonsai workshop I attended. It was February 2008 and I'd only been a member of my club for about three months, so I didn't know any of the other members well yet. Combine that with the fact that I was the only woman at that workshop and it will come as little surprise that I found the experience slightly overwhelming.
 
February 2008 - before the workshop

The tree I took to that workshop was the Ficus Wiandi above. It's a rather brittle variety of Ficus, so I was advised not to wire the branches but rather to style it using the clip and grow method, aided by the odd stick used for support.

I removed some of the unwanted branches at that workshop but told my instructor that I'd remove the others at home . My reason? I wanted to plant the cuttings. At that stage my tree looked like this:

February 2008 - after the workshop

Some of the men doubted my resolve to go through with what was suggested, believing that I was afraid to do heavy pruning on my tree, but they were wrong. I went home and removed those branches, putting them into jars of water while I waited for them to root. At that stage my tree was looking pretty bare:

February 2008 - after final pruning

 After that I let it grow unrestrained until December 2008 before taking it to another workshop. During that period it grew really well and the trunk thickened up considerably.

December 2008 - before pruning

After another workshop, it looked like this:

December 2008 - after pruning

The highlight of my relationship with that tree was when I displayed it at our 2009 club show, only 20 months after that first workshop. It didn't take much to satisfy me back then and our club has always encouraged beginners to show their trees, so this is what I put on display:

On show - October 2009

As I grew more experienced I started to see my tree's shortcomings and tried to improve its appearance, but in doing so I forgot my instructor's advice and tried  to wire one of the branches. Sure enough it broke off.

I still persevered with it for a while after that, but it refused to do what I wanted it to, so when show time came around again, I decided to put it on the sales table.

On the first morning of the show one of our senior members was looking at the sales table and got into a discussion on how to improve my tree. Apparently he decided to demonstrate what he would do and, unaware of its brittle nature, he snapped off another branch. Under the circumstances he felt obliged to buy the tree.

I still have one of its cuttings.

Uncooperative cutting - December 2015

It has developed a nice plump base, but like its parent before it, it refuses to give me a decent branch structure to work with. I keep cutting back the top, hoping to get some back-budding, but I fear I'm fighting a losing battle.