The reason I dislike wiring is partly down to sheer laziness. It takes a lot of time and patience to wire every branch of a tree, right down to the tiniest twigs. And then there's the need to watch the tree closely to ensure the wires are removed before they bite so hard that they create deep scars which may never heal completely. That becomes a problem when you've got as many trees as I have.
But I've got a better reason. I'm okay with wiring thin branches, but my hands aren't strong enough to cope with heavy wire and even if I succeed in applying it, bending a newly wired branch into the desired shape is often beyond my capabilities. I don't want to become too dependent on the men at my club to do that for me. I'd hate to think that all my trees were the product of someone else's labour. Where's the fun in that!
Followers of the Lingnan School of Penjing grow naturally styled trees using the clip and grow method. I'd like to learn more about the steps they take in the development of their trees, but I'm struggling to find any literature on the subject. It's never been discussed at my club either.
So I've been trying to solve the riddle for myself. I have one little tree that has never been wired:
 |
| Ficus Natalensis - March 2016 |
It's one of the two I discussed in my post Two Ficuses - Bonsai in Training. The second tree in that post has had the two lowest branches wired once to reposition them slightly.
 |
| Ficus Natalensis - March 2016 |
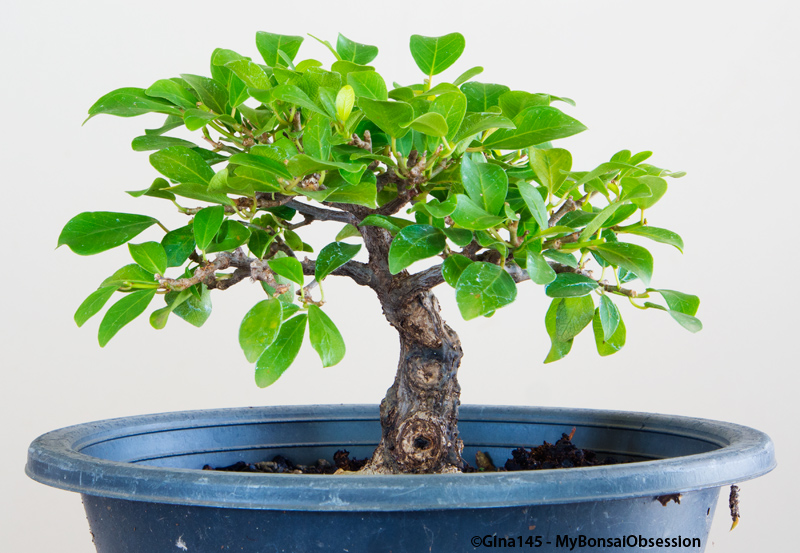
Today I'm discussing a tree which is still in a much earlier stage of development. I'm taking this one really slowly.
 |
| Ficus Natalensis - March 2016 |
It doesn't look like much from this angle, but the good part is hiding behind the lip of the pot.
It's another Ficus Natalensis (indigenous to South Africa), genetically identical to the two above. They're all trees I propagated from either branch or root cuttings. Well strictly speaking this one propagated itself. I'd cut a surface root off its parent tree but didn't remove it from the pot. Having started life in a shared pot, the tree naturally grew at a slant as it reached for light beyond its parent's shadow.
Before I repotted this tree I'd made the mistake of growing most of my trees upright. Fortunately I had the sense to keep this one at its chosen angle.
 |
| Ficus Natalensis - December 2012 |
I'm not sure how long after I separated it this photo was taken, but it must have been a while because it was looking rather pot bound. This was what it looked like after its first pruning, one which I realise with hindsight was rather premature.
I didn't do too much to it for the next year. Then I discovered a photo which I took as inspiration for styling a slim slanting tree. At that stage I picked a new leader, leaving me with this:
 |
| Ficus Natalensis - December 2013 |
The tree, however, had other ideas and soon put out a lot of low growth.
 |
| Ficus Natalensis - March 2014 |
Seven months later it was looking nothing like the tree I'd planned.
 |
| Ficus Natalensis - July 2014 |
By then I had a new idea about where I wanted to go, but I wasn't going to rush things, so I waited another eight months for my new leader to thicken, then made a really drastic chop.
 |
| Ficus Natalensis - March 2015 |
In the last year it's grown quite vigorously and that leader has thickened substantially.
 |
| Ficus Natalensis - March 2016 |
When I brought it inside to photograph it for this post, I removed a couple of unwanted aerial roots and one tiny branch from where there were two growing at the same point. I'm not planning to do anything major until next summer, when I plan to move it to a bigger pot. For now I might shorten some of the top branches to encourage more growth lower down, but that's about it.
My future plans are to do another major chop as illustrated here:
 |
| Planned spot for future chop |
Before I do that, however, I want both the current and future headers to thicken up a bit more.
Just where it goes after the next chop remains to be seen. As this tree has had a major say in every step I've taken so far, it may well make that decision for me.
I've no idea how long it will take before this tree starts to resemble bonsai, but that's okay. I'm prepared to wait as long as it takes.
Hi, nice blog and bonsai collection. I noticed that your pots do not have any holes on the sides. Are you aware that air-pruning pots like net-pots,colanders, fabric pots & pond buckets can give you faster & healthier growth. My blog illustrates more on this - http://instantbonsaiforeveryone.blogspot.com
ReplyDeleteThanks. I do use pond baskets for some of my trees, but they work out quite expensive. I buy most of my training pots really cheaply at my club.
DeleteI'll visit your blog to see what you say about them.